Mastering the Art of Photography for Hardware Components: A Comprehensive Guide
Photography has become an essential tool for capturing the perfect image of hardware components. To master this art, one must understand the basics of photography and how to use various techniques to capture the best shot. In this comprehensive guide, we will cover everything from lighting to composition, and provide tips on how to take stunning images of hardware components. We will also discuss the importance of editing software and how to use it to enhance your photos. Whether you are a beginner or an experienced photographer, this guide will provide you with the knowledge and skills needed to create professional-quality images of hardware components. So, let's dive in and start capturing those beautiful shots!
Introduction
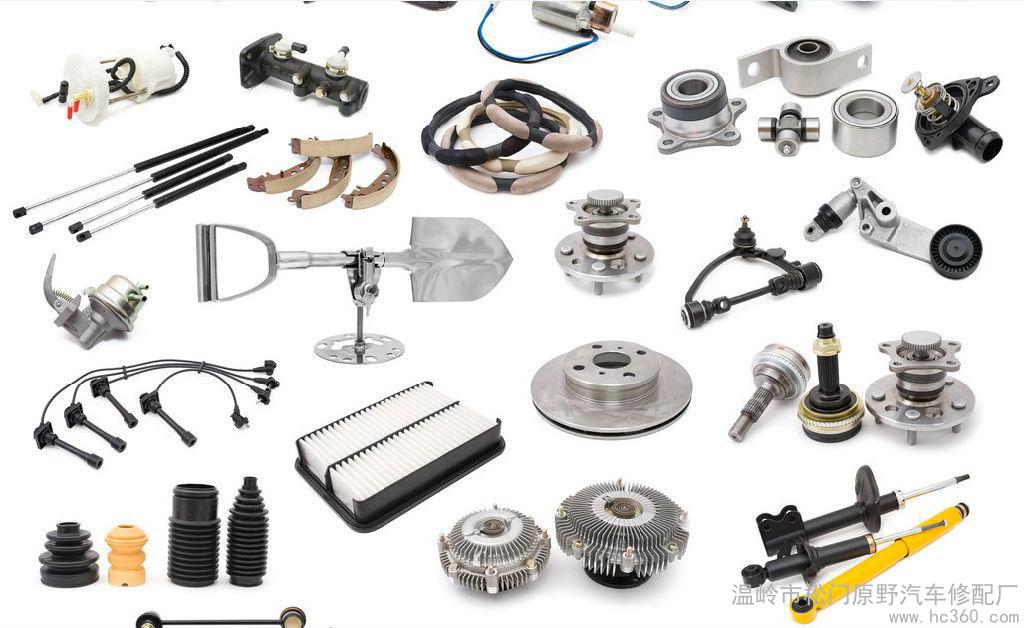
Hardware components, also known as metal parts or metal components, are essential elements in various industries and applications. These components come in different shapes, sizes, and materials, making them challenging to photograph. However, with the right techniques and equipment, capturing high-quality images of hardware components is possible. In this guide, we will explore the best practices for photographing hardware components and provide tips on how to make your photos stand out.

Section 1: Lighting
Lighting plays a critical role in photography, including when capturing images of hardware components. The first step in setting up your lighting for hardware photography is to understand the properties of light sources. There are three types of light sources: natural, artificial, and混合.
1、1 Natural Light
Natural light is the most abundant and cost-effective option for photography. When shooting outdoors, position your camera facing towards the sun. This will ensure that the light is coming from the right angle, creating a soft and diffused effect. If you're shooting indoors, try to position your camera near a window that allows natural light to enter. Be careful not to expose your subject directly to direct sunlight, as it can cause harsh shadows and uneven exposure.
1、2 Artificial Light
Artificial light is used to supplement or replace natural light when necessary. Flashguns, soft boxes, and umbrellas are commonly used artificial light sources. When using flash, keep in mind that it can produce harsh shadows and washout your image if not used correctly. Soft boxes and umbrellas help soften the light by diffusing its intensity and direction. Experiment with different light setups to find the one that works best for your subject and style.
1、3 Mixed Light
Mixed light refers to the combination of natural and artificial light sources. This technique can create unique and creative effects, but it requires careful planning and experimentation. For example, you may want to shoot your product under a skylight or use a reflector to bounce light onto the subject from a nearby window.
Section 2: Camera Settings

The settings you choose for your camera depend on several factors, such as the type of light source, the distance between you and your subject, and the desired depth of field. Here are some general recommendations for camera settings when photographing hardware components:
2、1 ISO
ISO determines how sensitive your camera's sensor is to light. A higher ISO value will result in more noise and graininess in your image but will allow you to capture better low-light performance. For most hardware products, an ISO range of 100-400 is suitable. However, you should experiment with different ISO settings to find the one that yields the best results for your specific situation.
2、2 Shutter Speed
Shutter speed determines how long your camera's shutter remains open to let in light. A slower shutter speed (such as 1/8 second) can create motion blur and freeze movement within your subject. However, if you overuse it, you may risk creating unsharp images due to camera shake. For most hardware products, a shutter speed of 1/60 second or faster is sufficient. Again, be sure to experiment with different shutter speeds to find the one that works best for your subject and environment.
2、3 Aperture
Aperture controls how much light enters your camera's lens, resulting in a shallower or deeper depth of field. A larger aperture (such as f/1.8) will allow more light into your scene while creating a shallower depth of field, which can be useful for highlighting specific details within your subject. A smaller aperture (such as f/8) will result in a deeper depth of field, which can be useful for keeping your entire scene in focus. For most hardware products, an aperture range of f/4-f/8 is suitable. Again, feel free to experiment with different aperture settings to see what works best for your subject and style.
Section 3: Subject Matter and Poses
When photographing hardware products, it's essential to consider their unique features and characteristics when choosing your subjects and poses. Here are some tips on how to approach your subject matter:

3、1 Choose Your Subject Carefully
Select hardware products that showcase their unique features and advantages effectively. Consider factors such as design, color scheme, texture, and functionality when selecting your subjects. Also, pay attention to lighting conditions when taking pictures; they can significantly impact the overall look of your final product.
3、2 Experiment with Angles and Perspectives
Experiment with different angles and perspectives when photographing hardware products. Try shooting from above or below the product to highlight its size and shape differently. You may also consider shooting from a side angle or at an odd distance to add interest to your composition. Be creative with your angles and perspectives to make your photos stand out from other images featuring similar products.
3、3 Use Props and Supporting Elements Wisely
Props and supporting elements can help enhance the visual storytelling aspect of your images while emphasizing key features of your hardware products. Consider using props like clamps, screws, or bolts to show off product functionality or using background elements like walls or machinery to create context for your photo shoot location. However, be careful not to include too many props or distracting elements that could detract from the main focus of your image.
Conclusion
Photographing hardware components requires skill, patience, and creativity. By following these tips on lighting, camera settings, subject matter, and poses, you can improve the quality of your images and create visually engaging content that showcases the unique qualities of your products effectively. Keep experimenting with different techniques until you find the ones that work best for you and your brand, and don't be afraid to get creative!
Articles related to the knowledge points of this article:
Aluminum alloy hardware fittings: an overview
The Tax Rate of Hardware Accessories
Title: Understanding Customs Coding for Footwear and Hardware Components
The Importance of Hardware Accessories in the Modern World
Title: Is the Beijing New Type Hardware Kitchware Trustworthy?