How to Perform a Hardware Diagnostic on Your Computer
Performing a hardware diagnostic on your computer is an important step in ensuring its proper functioning. A hardware diagnostic test checks the various components of your computer, including the CPU, memory, storage devices, and network cards, to identify any issues or potential problems. ,To start a hardware diagnostic, you can use built-in tools provided by your operating system or download third-party software specifically designed for this purpose. These tools will typically run tests to check the speed and stability of your computer's hardware. ,During the diagnostic process, you may be prompted to enter information about your computer's specific model and manufacturer. This information can help the diagnostic tool generate more accurate results. ,It is important to note that hardware diagnostics may not always detect all issues, so it is recommended to perform regular maintenance tasks, such as updating drivers and cleaning your computer's registry, to keep your system running smoothly. ,In conclusion, performing a hardware diagnostic on your computer is a crucial part of maintaining its optimal performance. By utilizing built-in tools or third-party software, you can quickly and easily identify potential problems and ensure the continued health of your machine.
In today's digital age, computers have become an essential part of our daily lives. They are used for various tasks such as work, entertainment, communication, and education. However, just like any other electronic device, computers are prone to hardware issues that can cause them to malfunction or even crash. One way to identify and fix such problems is by performing a hardware diagnostic on your computer. In this article, we will discuss the steps you need to follow to run a hardware diagnostic on your computer and how it can help you identify and fix any underlying issues.
1、Prepare Your Computer for Diagnostics
Before you begin running a hardware diagnostic on your computer, make sure you have the necessary tools and materials ready. This includes a USB drive with the diagnostic software (if required), a restartable battery backup power source (if applicable), and a clean and dry working environment. You may also want to close all unnecessary programs and applications to avoid干扰 during the diagnostic process.

2、Download and Install the Diagnostic Software
The next step is to download and install the diagnostic software on your computer. There are several free and paid diagnostic tools available online, such as Microsoft's Windows Memory Diagnostic Tool, AIDA64 Hardware Inspector, and PassMark PerformanceTest. Choose the one that best suits your needs and operating system. Follow the installation instructions provided by the manufacturer to ensure a smooth installation process.
3、Connect Your Computer to the Internet
Some hardware diagnostic tools require internet access to function properly. Therefore, connect your computer to a reliable Wi-Fi network or use an Ethernet cable if needed. Make sure your internet connection is stable before running the diagnostic.
4、Run the Hardware Diagnostic

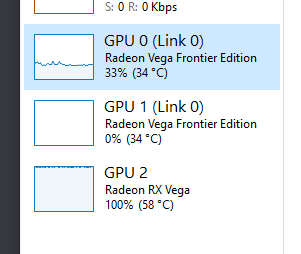
Once you have installed the diagnostic software and connected your computer to the internet, open the tool and follow the prompts to begin the hardware diagnostic process. The tool will scan your computer's hardware components, including CPU, memory, hard disk, graphics card, and network adapters. It will also check for any errors, warnings, or issues related to these components. The duration of the diagnostic process depends on the complexity of your computer's hardware configuration and can range from a few minutes to an hour or more.
5、Review the Diagnosis Results
After the diagnostic process is complete, review the results carefully. Look for any errors or warnings displayed by the tool, as they can provide valuable insights into the health of your computer's hardware components. If there are any issues detected, the tool may provide recommendations or suggestions for resolving them. In some cases, you may need to contact a technician or service provider for further assistance.
6、Take Action Based on Diagnosis Results
If your computer's hardware components are not functioning properly, take action based on the diagnosis results. For example, if there are memory issues detected, try upgrading your RAM or swapping out faulty modules. If there are disk errors, format or restore your hard drive using data backup tools or services. If there are network adapter issues, update drivers or replace damaged hardware parts. Remember to always seek professional advice when dealing with complex hardware problems or conflicts.

7、Regularly Perform Hardware Diagnosis Tests
To maintain optimal performance and prevent hardware problems in the future, consider regularly performing hardware diagnostic tests on your computer. This can help you identify potential issues early on and prevent them from escalating into more significant problems down the line. Set up regular scheduled maintenance tasks in your operating system or third-party software to perform automatic diagnostic tests at specific intervals or after specific events (e.g., after installing new software or updating drivers).
In conclusion, performing a hardware diagnostic on your computer is a crucial step in identifying and fixing any underlying problems with your hardware components. By following the steps outlined in this article, you can ensure that your computer stays healthy and functional for years to come. Remember to stay vigilant about maintaining your computer's hardware components and seek professional help when necessary.
Articles related to the knowledge points of this article:
Saddle Hardware: The Essential Guide to Buying and Caring for Your Saddle Hardware
Hardware Bags: The Ultimate Guide
Title: Wohlfeil Ace Hardware: A Masterpiece of Quality and Innovation
Title: Trimmer Hardware: An Introduction to the Basic Components and Their Functionality